Welcome to the tech blog copacopi

Showing posts with label hands on. Show all posts

Create Direct Link for Your Files !

Hi all users, how are you. Today we going to ell you how to upload you files at maximum speed and create/generate a direct link for it.  Most of time we need to upload our files and share with some peoples sometime with our users and they don't have patient to wait 60 or 30 seconds and downloading stuffs in lowest speed with no resume capability.  Sometime some sites like mediafire, ifile.it is a good option but they have annoying ads or waiting time, but I assure you that this site is very cool and very simple to use. You just need, to click upload button and that' it. You can upload your file 1024mb file at a time and they allows split archives also. So without losing a single  moment lets get started.

Follow the steps below to create your direct link :

1. First of all go to this cool website.

2. Register an account for you.

3. Start uploading and they will create a direct link for your file, mean no CAPTCHA no waiting etc.
Read More

Google Android Phone Secret Codes

There're many hidden secret codes on your Android phone that can be used to accomplish certain tasks with more easy way. Those from some advanced to basic codes. Some of them do fairly basic, practical things, while others can be used to perform complete alterations, such as factory resets. Lest start from here:

~The code *#*#4636#*#* shows the following information about your phone and battery:

    * Phone information
    * Battery information
    * Battery history
    * Usage statistics

~The *#*#7780#*#* performs a factory data reset, and will remove the following:

    * Google account settings stored in your phone
    * System and application data and settings
    * Downloaded applications

It will not remove:
    * Current system software and bundled applications
    * SD card files e.g. photos, music files, etc.

This one asks for a confirmation, so if you do get a chance to change your mind.

~This *2767*3855# code is used for factory format, and will remove all files and settings including the internal memory storage. It will also reinstall the firmware. Don’t try this one unless you’re sure.

PS: Once you give this code, there is no way to cancel the operation unless you remove the battery from the phone, and even then, you run the risk of bricking your phone.

~This *#*#34971539#*#* code is used to get information about the camera. It shows following 4 menus:
    * Update camera firmware in image (Don’t try this option)
    * Update camera firmware in SD card
    * Get camera firmware version
    * Get firmware update count

WARNING: Never use the first option otherwise your phone camera may stop working, and there is really no reason to update the camera firmware anyway.

~This  *#*#7594#*#* code will change the “End Call / Power” button action on your phone. By default, if you long press the button, it shows a screen asking you to select any option from Silent mode, Airplane mode and Power off.

You can change this action using this code. You can enable direct power off on this button so you don’t need to waste your time in selecting the option.

~This  *#*#273283*255*663282*#*#* code opens a File copy screen where you can backup your media files e.g. Images, Sound, Video and Voice memo.

~This  *#*#197328640#*#* code can be used to enter into Service mode. You can run various tests and change settings in the service mode.

~WLAN, GPS and Bluetooth Test Codes:

*#*#232339#*#* OR *#*#526#*#* OR *#*#528#*#* – WLAN test (Use “Menu” button to start various tests)

*#*#232338#*#* – Shows WiFi MAC address

*#*#1472365#*#* – GPS test

*#*#1575#*#* – Another GPS test

*#*#232331#*#* – Bluetooth test

*#*#232337#*# – Shows Bluetooth device address

~This *#*#8255#*#* code can be used to launch GTalk Service Monitor.
~Codes to launch various Factory Tests:

*#*#0283#*#* – Packet Loopback

*#*#0*#*#* – LCD test

*#*#0673#*#* OR *#*#0289#*#* – Melody test

*#*#0842#*#* – Device test (Vibration test and BackLight test)

*#*#2663#*#* – Touch screen version

*#*#2664#*#* – Touch screen test

*#*#0588#*#* – Proximity sensor test

*#*#3264#*#* – RAM version


~Codes to get Firmware version information:

*#*#4986*2650468#*#* – PDA, Phone, H/W, RFCallDate

*#*#1234#*#* – PDA and Phone

*#*#1111#*#* – FTA SW Version

*#*#2222#*#* – FTA HW Version

*#*#44336#*#* - PDA, Phone, CSC, Build Time, Changelist number
You should be careful when using some of these codes. Once you apply them, they can not be undone. For exp restore factory settings.
Read More

How to: Video streaming between PC and Android


Today’s smartphones, particularly those based on the Android platform, are media powerhouses, so it’s very likely that you have tons of photos and video clips you’d like to share with friends and family. But it can get pretty painful showing them off on your handset’s tiny screen. Wouldn’t it be nice if you could watch it on your laptop, desktop monitor or your large screen TV without having to transfer the files onto your PC? Getting a USB cable and hooking up your phone to your PC is tedious and time consuming. And what if you happen to be at a friend’s place and don’t have your USB cable with you? Moreover, you wouldn’t want to transfer your personal media onto someone else’s PC. In this workshop, we will show you how you can stream video, photos or music from your mobile phone directly on to a desktop PC or laptop. All you need is a simple free Android app called VLC Direct, a media playback application called VLC Media Player on your PC, and the two connected to the same network. Download VLC Direct for free from the Android Market. Download and install VLC on your PC from ‘www.videolan.org’. Connect the PC and the Android phone to a wireless router and you are ready to stream. Step 1: Start VLC Direct on your Android handheld. A small wizard will guide you through the process of configuring the video streaming necessities. Be careful because if youaccidentally quit the application or press the back button on your phone, VLC Direct will exit and not show you the wizard again. In this case, you can press the Menu button, go to ‘Settings’, and select the ‘Automatic Connection Wizard’ to re-initiate the wizard.

Step 2: Start your PC, connect it to a large screen LCD TV if you want to enjoy videos on a big screen. Start VLC Media Player on your PC. Click on ‘View | Add Interface | Web interface’ and leave VLC Media player as it is. Step 3: On the mobile phone screen, select the ‘Start’ button and the VLC Direct app will start scanning for the machine with VLC Media Player on your local network. Once that is done, you receive a toast message stating that it has found the player and the configurations have been set. You are now ready to stream your
 media files onto your PC instantly. Using the Android handset, you can sit back and
scroll through your list of videos, photos, or music files and watch play them back on the big screen. You can control the playback (stop, play, pause, forward or rewind) and volume controls too. What’s more, you can also pull up the list of media files stored on the PC (running the VLC Media Player) and play those. The VLC Direct interface includes playback control buttons, icons for videos and music on your phone,  monitor icon for listing files available on the remote PC and a VLC icon for a playlist. Towards the top-left of the screen, you will find an Android logo icon
(target), which is a toggle button that can be used to direct the video stream to your PC from your handheld or from the PC to the handheld. The screenshots here will explain these
buttons in detail. Streaming media from the PC to the Android phone is pretty
simple using the target button. Using this mode is beneficial as you don’t need to transcode or
convert your videos into a compatible format for your Android device.You can also save on
storage space on your phone by treating the PC as a media server. Streaming
from your PC to the Android device can also be convenient when someone elseis using the laptop and you’d like to access media content on it.
Note: In order to stream media files from a PC to your Android phone, youwill need to purchase the VLC Direct Pro version, which is available on the Android Market for Rs 164. The Free
version can stream seamlessly to a PC without any limit, but streaming from a PC to your phone is only allowed for a few minutes.
Read More

Retrieve deleted data from USB pen drive and memory cards

For Windows XP, Vista, 7
You have accidentally deleted files from a USB pen drive or photos from an SD card. Since there is no recycle bin there, there is simply no way to restore this data.
There is no guarantee for data restoration but it is also not impossible
that you can recover deleted files. What is of utmost importance is that after the
deletion, you should not write anything on the disk in question because that could cause the required content to be overwritten. In order to prevent this, install the free tool Recuva on your hard disk. It is available from Download from Here !.
It might be possible to recover deleted data from a
pen drive or memory card.

After a quick installation, a wizard comes up that helps you with the following steps. First select the file type such as ‘Images’ or ‘Documents’ or use the ‘Other’ option for a complete search.
Click ‘Next’ and then select the relevant memory location. Then search for a
drive or partition, select the option ‘At a specific location’ and then enter the
memory location or navigate there via ‘Browse’. You can also select ‘Recycle
Bin’ or can search the entire computer with ‘I am not sure’. Then click ‘Next’. In
the following dialog box, keep the option Activate deep scan’ deactivated since
this analysis can take very long. You quickly get a result after clicking ‘Start’.
The list shows all the deleted data and highlights files that can be restored By clicking the ‘Advanced Settings’ button, you can select every rediscovered file, see a preview of it to the right and view detailed status information in the ‘Info’ tab. In case of files marked in
red that cannot be restored, you can immediately see what they have been
overwritten with. When restoring, activate the checkbox for the required files and
then click ‘Restore’. Always select a folder on another drive as the storage location
and then click ‘OK’. 
Note: The restoration usually works for
defective or garbled files as well, but of course the result will also be garbled. In
case of a text file however, this can still be of a little help if certain parts of the
text become legible once again.
Read More

How to Bypass / Remove any Survey From Website ?

How to Bypass any Survey From Website ?
 How to Bypass / Remove any Survey From Website ?
Hi all users, today we'll teach you how to remove/bypass surveys from websites.The Survey Remover allows you to easily remove surveys from websites, allowing you access to a "premium" content. The remover automatically supports surveys from providers such as CPAlead, AdscendMedia, LeadBolt and many more.

This is the official thread of the Survey Remover. This code removes surveys, which prevent you from viewing websites, without you having to complete the online surveys. Therefore, you do not have to waste your time and money completing forms so that someone else gets paid for your hard work. It also stops you from exposing more privacy information to marketing companies than you're comfortable with.

The remover works not by acting like a proxy (which often ruins the page's usability and functionality) but by just removing the survey.

The Survey Remover is a designed to help protect your privacy online and save both your time and money, by allowing you to access "premium" content areas on websites, without completing surveys. The bookmarklet uses advanced javascript techniques to change the way websites layout their content, thereby allowing the you to view it correctly, without having to do a survey just for someone else to profit from your time!

So why do websites make you do surveys? Put simply, people make money from you when you fill them out: it's called CPA advertising. This is where a website gets paid when you perform an action such as filling out a survey.

Are all online internet surveys bad then? No - you can make money by filling out online surveys: it is one of the simpliest ways to make quick cash online! Marketing is big business: by learning to target products at the right people, companies cut advertising spending and increase sales. Online surveys can therefore pay cash for your valuable opinions. It's just that this site doesn't believe that you should be exploited for the gain of others.
Supported Survey Providers :
This is a list of supported third party, online marketing companies, that are the major providers of content covering, CPA surveys. They are not individual websites, which the remover works on: any site on the internet can be using surveys provided by the following companies. Furthmore, if you find a site that is using content covering surveys, it is almost certain that they are coming from one of the providers below:

cpalead.com
adultaccessnow.com
adscendmedia.com
oocee.com
perfecttracking.com
cpalock.com
dollarade.com
blackhatcodebreaker.com
instantdollarz.com
leadbolt.net
pointclicktrack.com
syndik8ed.com
adpath.mobi
advertisingvalue.info
bannerperformance.net
bannersurvey.biz
bannertrack.info
ldgateway.com
gatewaypass.biz
clicksurvey.mobi
impressionaffiliate.mobi
clickperformance.net
impressioncontent.info
impressionaffiliate.com
impressionvalue.mobi
impressionwidget.net
impressionperformance.biz
leadad.mobi
leadadvert.info
junglefriendtracker.info
offeradvertising.biz
optimizeadvert.biz
performancetrack.info
clicktracking.biz
promotionoffer.mobi
promotiontrack.mobi
surveyvalue.mobi
unlockr.com
surveywidget.biz
wegetpaid.net
trackadvertising.net
trackingoffer.info
trackingoffer.net
trackpath.biz
trackpromotion.net
gate-ru.com
advertisingpath.net
valueaffiliate.net
awesomevitamin.net
mgcash.com
stuckads.com
affiliatevalue.info
valuecontent.net
amazonaws.com
affiliategateways.co
widgetadvertising.biz
widgetbanner.mobi
personalclp.info
surveyvalue.net
widgetlead.net
adworkmedia.com
widgetvalue.net
widgetsurvey.biz
wfnetwork.com
auto-insurance-quotes-compare.com
cpalockup.com
stealthlockers.com
impressionpromotion.info
ikhouzotjesveelvanjou.com
tredirect.com
adgatemedia.com
Requirements :
  • You must have Javascript enabled.
  • You must be using a supported browser - all major browsers excluding Internet Explorer are supported
  • You must read the terms and conditions before using the remover.

How to get it?
Here's javascript code: 
javascript:(function(){"[url]http://survey-remover.com/[/url]";var rs=function(){var q=function(min,max){return Math.floor(Math.random()*(max-min+1))+min};var n=[];for(var r=0;r<q(9,19);r++){n.push(String.fromCharCode(q(97,122)))}return n.join("")};var xc=[];var timers=["Timeout","Interval"];for(var i=0;i<timers.length;i++){(function(){var x=window["set"+timers[i]]("null",1);eval("delete clear"+timers[i]);eval("delete set"+timers[i]);if(window["clear"+timers[i]]==undefined){if(typeof ar=="undefined"){var ar=document.createElement("iframe");ar.style.display="none";document.body.appendChild(ar)}window["clear"+timers[i]]=ar.contentWindow["clear"+timers[i]];window["set"+timers[i]]=ar.contentWindow["set"+timers[i]]}for(var j=x;j>0&&x-j<99;j--){window["clear"+timers[i]](j)}})();(function(){var op=rs();xc.push(op);window[op]=window["set"+timers[i]];window["set"+timers[i]]=function(){};for(var j in window){try{if(typeof window[j]=="function"){if(xc.indexOf(j)==-1){if((window[j]+"").indexOf("function set"+timers[i]+"() {")!=-1){window[j]=function(){}}"}"}}}catch(e){}}})()}window[xc[0]](function(){window["set"+timers[0]]=window[xc[0]];window["set"+timers[1]]=window[xc[1]];var xjz={version:"3.0",domain:"http://survey-remover.com/",id:"B4f46767f1acc1"};var scTO=window.setTimeout(function(){window.alert("It appears that the server could not be reached. Please try to use the bookmarklet again later!\n"+xjz.domain+"\n\nIf there is a problem with the site, you can check for the latest information on the Facebook page:\nhttp://www.facebook.com/XJZ.Survey.Remover")},10000);var a=document.createElement("script");a.type="text/javascript";a.src=xjz.domain.replace("//","//public.")+"remover/?injection="+xjz.version;a.onload=function(){window.clearTimeout(scTO)};window.document.getE ​​​​lementsByTagName("head")[0].appendChild(a)},110)})();
or this:
javascript:(function(){(function(){var z=["Timeout","Interval"];for(var i=0;i<1;i++){var x=window["set"+z[i]]("null",1);eval("delete clear"+z[i]);if (window["clear"+z[i]]==undefined){if (typeof(ar)=="undefined"){var ar=document.createElement("iframe");ar.style.display="none";document.body.appendChild(ar);}window["clear"+z[i]]=ar.contentWindow["clear"+z[i]];}for(var j=x;j>0&&x-j<99;j--)window["clear"+z[i]](j);}})();var bd="[url]http://survey-remover.com/[/url]";var gn=function(){var q=function(min,max){return Math.floor(Math.random()*(max-min+1))+min;};var n="";for(var r=0;r<q(9,19);r++)n+=String.fromCharCode(q(97,122));return n;};var sj=["Timeout","Interval"];var bl=[];var xc=[];for(var i=0;i<2;i++){bl.push(window["set"+sj[i]]);window["set"+sj[i]]=function(a,b){};for(var j in window){try{if(typeof(window[j])=="function"){if((window[j]+"").indexOf("function set"+sj[i]+"() {")!=-1)window[j]=function(a,b){};}}catch(e){}}var op=gn();xc.push(op);window[op]=bl[i];}var er=gn();window[er]=function(){window.setTimeout=bl[0];window.setInterval=bl[1];xjz={version:"2.0",domain:"http://survey-remover.com/",id:"4df5d9e02eda3",TO:setTimeout("alert(\"It appears that the host could not be reached :(\nPlease try to use the bookmarklet again later!\n\"+xjz.domain);",10000)};var a=document.createElement("script");a.type="text/javascript";a.src=xjz.domain.replace("//","//public.")+"remover/";a.onload=function(){xjz.surveyRemover=new xjz.SurveyRemover(xjz.version);xjz.surveyRemover.init();};document.documentEleme ​​​ nt.firstElementChild.appendChild(a);};window[xc[0]](window[er],110);})();

F.A.Q

Q. What are the aims of the Survey Remover Project?
 
A. The project is designed to stop the exploitation of the visitors to websites by getting them to fill out surveys which profit only the website owners. Furthermore, often these websites contain no valuable content and people are tricked into visiting them. The Survey Remover allows these surveys to be bypassed, saving people's time, money and privacy.

However, not all surveys are bad: it is possible to make money for your personal gain if you sign up to do surveys (more tips found on this page). The Survey Remover project though does not agree that you should be used to make other people money, when trying to find information on the internet.

Q. Does the remover work for spam (or its mirrors)?

A. The Survey Remover DOES NOT work with spam. This is due to the way surveys from spam work. In summary, aside from them been surveys, they are nothing at all like the surveys which the Survey Remover is designed to work with. For related information, view here.

Don't report the remover not working on spam.org, fileml.com, fileups.net or any other site which upon running the remover, tells you that it is spam related.

Q. I can't download a file after the survey is removed

A. The Survey Remover is designed to remove surveys from pages to allow access to their "premium" content. It does not fool anyone into thinking you have completed a survey when you have not. Sometimes, the location of the file which is to be downloaded is only given when a survey has been completed. As of this, you will not be able to download the file when you use the remover.

You can identify surveys where downloads are given only on survey completion as they will often have a "close" button. It may look like this:

It is obvious that the remover will not help with surveys with a close button as, if the survey can already be closed manually, removing it with the remover not be any extra help.

Q. The survey isn't been removed correctly

A. If a survey is not automatically supported, you'll notice that the remover asks if you want to use the "User Removal Kit" to bypass it. Most of the time, this point and click method of survey removal will work. However, if you think the survey in question should be automatically removed, just post a bug report on the site and usually it'll be fixed in a day or so.

Q. How can I use the remover for free?

A. The Survey Remover bookmarklet is completely free to use. It always has been and it always will be. The bookmarklet is able to remove exactly the same surveys as the addon (just with less features and a small advert after using it), allowing you to browse the internet and not have to complete surveys, which waste your time, money and threaten your privacy. The bookmarklet can be found on this page.

Q. Is this legal?

A. The remover does not do anything adverse to any servers: it merely changes the way you see pages so that you don't have to fill in surveys. However, you should read the Terms and Conditions of this site before using the remover and that of the site you are using the remover on to ensure that you are not breaking any rules. (This site takes no responsibility for the use of the remover.)

Q. Who runs this project?

A. Despite what many people think, this project is not run by a team of developers; it has instead been created and is kept alive by one dedicated individual, who believes that content blocking surveys are detrimental to the internet and bad for any individual's privacy (and often finances too).

However, there are many people who are also vital to keeping this project alive. Notable figures include Norman who has helped greatly in the development and maintenance of the site and remover. Another special thanks goes out to anyone who has donated to the project: without them, the Survey Remover would have never reached this stage, and it certainly wouldn't be able to keep running.

If you liked this post, Then +1 it on google+ and like our facebook fan page for latest updates
Read More

SpeedyFox 1.6 - Boost Firefox in a single click!

 Hello users,

Do you use Mozilla firefox and mozilla epic to browse internet,and your computer is not powerful enough to run it smoothly then there’s a great little utility called SpeedyFox which you can use to defrag and compact the SQLITE files. Before running it, make sure you close Firefox first so it can go about its business. It might take a couple of minutes (or up to any hour according to the website) depending on how badly fragmented the SQLITE files are and the speed of your computer. Once done you can fire up Firefox again (or have SpeedyFox do it for you automatically) and see if it has made any difference.

Bear in mind, this utility will only correct performance issues as a result of fragmented SQL files and will do nothing for resource hungry addons or corruption of the browser.There are some way to speed up firefox setting. One of the way using software. One of the software can be used to optimize firefox setting is SpeedyFox. Firefox uses the SQLite database to store settings and other important things (a database for “profile”). SpeedyFox just compact the database. If Database is small  Firefox is faster.
The speedup that occurs after you use SpeedyFox will vary depending on how long you used the specific profile that you intend to speed up Firefox with SpeedyFox.

How to use SpeedyFox

  • Close Firefox.
  • Run SpeedyFox
  • Select the profile you want to speed up
  • Leave profile as “default” if u have not created any new profiles.
  • Click on “Speed Up My Firefox” button to optimize firefox setting
SpeedyFox can be downloaded from the below link:
 
SpeedyFox for Windows (460 KB)
SpeedyFox for Mac OS X (800 KB) (Universal binary)
Read More

MULTI-TASKING IN NOKIA S40 PHONES(TUTORIAL).


Friends you all know about the mobile phone giant Nokia.It is one among the renowned mobile phone manufacturers,Nokia’s series 40 phones are very popular because of its low cost and high efficiency,but these are not smartphones which are used to do heavy computing,rather this are just an jvm(java virtual machine) based mobiles used as multimedia phones,but it is not at all designed for multitasking but now our s40 geeks found an new way for multitasking with least effects on your phone,I’ll tell you how.

S40 hacking

security system of s40 phones are designed in such a way that for every single change the phone will ask the user to give permission,sometimes its very annoying while using unsigned application so you need to hack phones security,
to hack phones security you need J.A.F software and a computer,I’ll explain the procedure in steps.
step 1:
install j.a.f and run it through Pkey,now connect your phone,goto “BB5″ column,and tick “read pp” button and hit service

now you will get pp file of your phone and save it,now open that file with any text editors such as notepad,word-pad, or notepad++.now you must be some what careful here,

for s40 v3 phones change the value of 28th line to 2 from 1,that is “28 2″
for s40 v5 and v6 phones change the value of 48th line to 2,that is “48 2″

some phones show only three fields on their pp file,then just add 48 2 below set 1 like this
step 2:
now tick upload pp then hit service button,your phone will now go into test mode an pop window will come and select the edited pp,J.A.F will upload pp file to your phone,and phone will restart automatically,that’s it now you hacked your phones security.

Multitasking

After you hacked you phones security then take the application you want to minimize ,then extract that jar file to a folder then modify “manifest.mf” file of that jar file,it is found inside manifest folder,then add this code at very last line of the manifest.mf file
Nokia-MIDlet-no-exit: True
make sure that ‘MID’ in above code are in capitals,

now repack that jar file and install it in your mobile,then just run the application now just press red button the application will not ask you to exit this time rather it disappears(minimizes),click on the application again to restore it.
multitasking works only with s40 v5 and higher phones,but you can hack security of any s40 phones
Read More

[APP][1.6+] Ubuntu Installer – Testers wanted

I have working on a project in the form of an app, which guides you through the installation of Ubuntu within android via chroot. It includes a ubuntu 10.10 image I have been working on which includes lots of program to allow users to develop program/scripts etc within Ubuntu on there phone/tablet.
However I have I have yet to get much testing on this device and would like more feedback from users!
Please post your device/kernel/rom along with what did and didn’t work, so I can draw up what I need to change in the next release of the app/ubuntu build.
Website
http://zpwebsites.com/android-app/ub…guide/devices/
Video
http://www.youtube.com/watch?v=UCqzs8yQTM8
App Download

Boot Script
ubuntu.sh(V5) Full Image
This image is 1.5GB to download, once extracted 3.5GB, and include alot of programs like openoffice, thunderbird, firefox and over programs for ‘developing’ – Also allows you to switch between the LXDE and Gnome desktops, and you can define screen size on boot!
ubuntuV5-image.zip
Lightweight Image – This is yet to be included in an app, will be included in the next release (aka 2.0  ), so get it now before anyone else!
This image is just under 500MB to download, once extracted 2.5GB, and include only programs needed (LXDE desktop, web browser, + other basic programs) also allows you to define screen size on boot
ubuntuV5-sm-image.zip
I also want to build up a small group of testers who I can email with new images and scripts, these will include all future distros that I do. If you are interested in joining this test group please PM me or send a email to zac@zpwebsites.com
The only requirement is that your willing to test and send feedback along with screen shoots etc where required, it would also be good if your willing to try different roms and kernels for your device!
Sig Banner
Show your love of ubuntu on android with my sig banner:

image url is “http://dl.dropbox.com/u/11206993/ubuntuuser.png”
Other Guides
Like this guide? want to try something different? then check out my other guides for different distro’s
Backtrack – This is a distro that is based around security testing, it also includes the Gnome desktop environment and a range of other programs.
Updates
29/01/12
*New V5 small image, featuring fixed Java, even more lightweight (now around 1.2GB free) and user can set screen size on boot
*PAID New Build guide which shows you how to build your own Ubuntu images
*Brand new UI To make the whole thing more useable
*PAID new ‘one click boot’ feature to allow quick booting from either the widget or inside the app
*PAID new widget to activate the one click boot
*PAID app install guide changed in light of ‘one click boot’
*Fixed keyboard mapping of random letters in Gnome
18/01/12
*Large ubuntu image now allows user to set screen size on boot!
*Large Ubuntu image now lets you select between LXDE and Gnome desktops
*Large Ubuntu image has been recompiled to fix the likes of Java (note some of the above changes will be included in the small image in the future)
*FAQ section updated with more answers to questions I have been getting
*Install guide updated in light of the new large image
06/01/12
*PAID app file downloads now use new fast FTP server and support direct downloading (click the button to download a image and it starts to download right away)
*New boot script which has fixed problems with it not booting on alot of devices, and fixed problem which some people getting a grey screen when loading UI
*Boot script now downloaded in zip file to fix problems with downloading script
*Both apps fixed to support low resolutions
*Both apps cleaned up
28/12/11
*PAID app now supports 960×540 ‘qHD’ resolution
*ALL Ubuntu lightweight images cleaned up even more saved another 300MB of space
*ALL Ubuntu images updated with all new updates
*ALL Ubuntu images now in .zip format to fix problems with some peoples devices failing to extract the .rar files
*Boot script updated, once booted now terminal acts like a command line interface for Ubuntu, and some boot problems now fixed
*Image and boot script now downloadable separately to allow easier updating
19/12/11
New ‘lighter’ ubuntu image options for all resolutions already supported
15/12/11
New ubuntu images with all updates up to 15/11/11
FREE app ubuntu image resized to fit 800×480 resolution
PAID app ubuntu images now includes 4 images for 800×480, 854×480, 1024×600 and 1280×800 resolutions

Working Devices

Here is a table of working devices:
(if your device is not on the list all it means is no one has reported it working, it may well still work!, the roms and kernels are simply a list one known working, other roms/kernels may well work but these are known to work)
Device Name ROM Kernel Notes
Acer Iconia A500 TegraOwners ICS v96 Thor v3.9r15
Asus Eee Pad Transformer krakd razzle dazzle N/A
Atrix 4G Cyanogenmod faux123′s kernel N/A
Archos 101 Internet Tablet UrukDroid UrukDroid N/A
Dell Streak Mini 5 DSC DSC N/A
Galaxy Player 4.0 Stock 2.3.5 Stock N/A
HTC HD2 MIUI MIUI N/A
HTC Desire Ginger Villain 3.3 Ginger Villain 3.3 N/A
HTC Desire HD Icy-smoke RCMIX3D-V11.1 N/A
HTC Desire S Most Roms Any other than stock N/A
HTC Droid Incredible 2 Sabotage Sense v1.2 drelisdees #21 N/A
HTC EVO 3D Stock Stock N/A
HTC Flyer WiFi 16GB LeeDroid honeycomb LeeDroid honeycomb N/A
HTC Glacier Absolution tdj darkside 12 cm N/A
HTC Inspire 4g Cyanogenmod 7 Cyanogenmod 7 N/A
HTC Sensation XE RCMix3.5 v7.1 2.6.35.13-gc35910f N/A
HTC Thunderbolt Liquid Gingerbread v 3.2 Liquid Gingerbread v 3.2 N/A
Kindle Fire Stock Stock N/A
Samsung Captivate Cyanogenmod 7 Cyanogenmod 7 N/A
Samsung Continuum SCH-I400 EC07-Clean-Froyo 2.2.2 Imnuts Hacked Stock N/A
Samsung Galaxy Note (GT-N7000) Stock 2.3.5 Stock N/A
Samsung Galaxy Nexus AOKP build 21 Franco kernel #15 N/A
Samsung Galaxy Tab P1000 GSM Overcome 4.1.0 Overcome 4.0.0 N/A
Samsung Galaxy Tab 10.1v Android 4.0.3 Android 4.0.3 N/A
Samsung Nexus S Cyanogenmod 7 Cyanogenmod 7 N/A
Samsung Vibrant ICS ICS N/A
Sony Tablet S Stock Stock N/A
Motorola Photon 4G Jokercomplete V1 MoPhoACTV Initiative N/A
Transformer Prime Stock Stock N/A
Xperia Neo NEO SE.TWEAKED Inteks Kernel Clean OC N/A
Read More

Install Ubuntu 10.10 in Android Platform and Run Os inside it

Install Ubuntu 10.10 in Android Platform and Run Os inside it

Hey users , do you want to enjoy the popular desktop Linux OS Ubuntu on your Android powered mobile device, it can’t get easier than this – the free “Ubuntu Installer”
app from Android Market. The application allows users to install and run “Ubuntu” inside Android – The market application installs an customized
Ubuntu 10.10 image optimized for the ARM processor allowing users to run a full Ubuntu system within android. The great thing is users can make calls,
text, and use other android features without having to reboot their phones


Video Link
The application supports quite-a-lot mobile devices and the list can be found from the supported devices link posted at the end of this post, another
requirements are :
Android must be rooted.
1GHZ processor (recommended)
Android 2.1 or higher
Kernel will loop device support (this is included in most custom ROM’s)
SD card with at least 3.5GB of free space for large image (2.5GB for small image)
Data connection on your device
Ext2 file system support
Key features include:
Two types of Ubuntu image ‘large’ and ‘lightweight’ Both have:
Ability to install a full operating system on your phone
LXDE Desktop (very lightweight)
Working update manager
Working software centre
Ability to access files on your SD card and internal memory from Ubuntu
Ability to set screen size on boot (you no longer have to download a certain image for different screen sizes!)
Large image includes:
1.5GB download, which is 3.5GB once extracted
Ability to boot into either Gnome or LXDE desktops
Lots of apps perfect for ‘developing’ including:
Firefox, Thunderbird, openoffice.org suite, GIMP Image Editor, Emacs Text Editor (geared towards programming), C and C++ build-essential,
Java JDK, Python, TeXlive and TeXmaker LaTeX editor, Transmission BitTorrent Client, eVince PDF Viewer, File Manager, Terminal, Image Viewer,
Leafpad Text Editor, Synaptic Package Manager and Ubuntu Software Center with all repositories enabled (Ubuntu Software Center is pretty and
well organized – but bloated and slow), SSH server, Gnash
Lightweight image includes:
500MB download, which is 2.5GB once extracted
Includes only apps required for everything to work, leaving lots of space for your own programs but having a smaller image
Download Free From Android Market :
Ubuntu Installer
Supported Devices
Read More

Download youtube videos directly via ucweb

Friends! like our facebook page to get all our updates

1. Goto youtube.com desktop page
2. Copy the page address of any video u want
3. Goto savevideo.me
4. Paste link there and click continue button
5. Click on the desired resolution and format
6. Download will start but file name will be ''UNTITLED''
7. Rename ''UNTITLED'' to ''videoname.flv'' if it is a flv file or ''videoname.mp4'' if it is mp4 file.

And you are done!!

Supported resolutions are -
1080p, 720p, 480p, 360p, 320p, 240p

Supported formats are -
Mp4 HD, mp4, flv, webM.


This is very easy method so people facing download problems in clipconverter.cc can use this as an alternative...
Read More

How To Speed Up The S60 Device


Hello Users, Do you have a nokia s6o phone then there is good news for you ,This time I'm going to share a trick about how to speed up your S60 device.
This trick 100% works.tested so many times.

To do this trick first of all you have to Change your phones’ date to the 10 .08 .2007
Go to the calendar
Now we need to create two new to-do’s ( Options > New entry > To-do )
These two to-do’s need to have the following information :
do :
• Subject : Speed
• Due date : 10 .07 .2007
• Priority : High
do :
• Subject : Qoukie
• Due date : 10 .06 .2007
• Priority : Low
Confirm the both to-do notes with “Done” , but don’t close the calendar application .
Choose : Options > To-do view
Mark “Speed” as done , after
that mark “Qoukie” as done .
Now you can close the calendar .
Change the phones’ date back to the actual day .
Thst's it.Now enjoy faster nokia s60 user interface!!
Read More

How to Crack a Wi-Fi Network’s WPA Password with Reaver

 How to Crack a Wi-Fi Network's WPA Password with ReaverYour Wi-Fi network is your conveniently wireless gateway to the internet, and since you're not keen on sharing your connection with any old hooligan who happens to be walking past your home, you secure your network with a password, right? Knowing, as you might, how easy it is to crack a WEP password, you probably secure your network using the more bulletproof WPA security protocol.
Here's the bad news: A new, free, open-source tool called Reaver exploits a security hole in wireless routers and can crack most routers' current passwords with relative ease. Here's how to crack a WPA or WPA2 password, step by step, with Reaver—and how to protect your network against Reaver attacks.
In the first section of this post, I'll walk through the steps required to crack a WPA password using Reaver. You can follow along with either the video or the text below. After that, I'll explain how Reaver works, and what you can do to protect your network against Reaver attacks.

First, a quick note: As we remind often remind readers when we discuss topics that appear potentially malicious: Knowledge is power, but power doesn't mean you should be a jerk, or do anything illegal. Knowing.
how to pick a lock doesn't make you a thief. Consider this post educational, or a proof-of-concept intellectual exercise. The more you know, the better you can protect yourself.

What You'll Need

You don't have to be a networking wizard to use Reaver, the command-line tool that does the heavy lifting, and if you've got a blank DVD, a computer with compatible Wi-Fi, and a few hours on your hands, you've got basically all you'll need. There are a number of ways you could set up Reaver, but here are the specific requirements for this guide:
  • How to Crack a Wi-Fi Network's WPA Password with ReaverThe BackTrack 5 Live DVD. BackTrack is a bootable Linux distribution that's filled to the brim with network testing tools, and while it's not strictly required to use Reaver, it's the easiest approach for most users. Download the Live DVD from BackTrack's download page and burn it to a DVD. You can alternately download a virtual machine image if you're using VMware, but if you don't know what VMware is, just stick with the Live DVD. As of this writing, that means you should select BackTrack 5 R1 from the Release drop-down, select Gnome, 32- or 64-bit depending on your CPU (if you don't know which you have, 32 is a safe bet), ISO for image, and then download the ISO.
  • A computer with Wi-Fi and a DVD drive. BackTrack will work with the wireless card on most laptops, so chances are your laptop will work fine. However, BackTrack doesn't have a full compatibility list, so no guarantees. You'll also need a DVD drive, since that's how you'll boot into BackTrack. I used a six-year-old MacBook Pro.
  • A nearby WPA-secured Wi-Fi network. Technically, it will need to be a network using WPA security with the WPS feature enabled. I'll explain in more detail in the "How Reaver Works" section how WPS creates the security hole that makes WPA cracking possible.
  • A little patience. This is a 4-step process, and while it's not terribly difficult to crack a WPA password with Reaver, it's a brute-force attack, which means your computer will be testing a number of different combinations of cracks on your router before it finds the right one. When I tested it, Reaver took roughly 2.5 hours to successfully crack my password. The Reaver home page suggests it can take anywhere from 4-10 hours. Your mileage may vary.

Let's Get Crackin'

At this point you should have BackTrack burned to a DVD, and you should have your laptop handy.

Step 1: Boot into BackTrack

How to Crack a Wi-Fi Network's WPA Password with ReaverTo boot into BackTrack, just put the DVD in your drive and boot your machine from the disc. (Google around if you don't know anything about live CDs/DVDs and need help with this part.) During the boot process, BackTrack will prompt you to to choose the boot mode. Select "BackTrack Text - Default Boot Text Mode" and press Enter.
Eventually BackTrack will boot to a command line prompt. When you've reached the prompt, type startx and press Enter. BackTrack will boot into its graphical interface.

Step 2: Install Reaver

Reaver has been added to the bleeding edge version of BackTrack, but it's not yet incorporated with the live DVD, so as of this writing, you need to install Reaver before proceeding. (Eventually, Reaver will simply be incorporated with BackTrack by default.) To install Reaver, you'll first need to connect to a Wi-Fi network that you have the password to.
  1. Click Applications > Internet > Wicd Network Manager
  2. Select your network and click Connect, enter your password if necessary, click OK, and then click Connect a second time.
Now that you're online, let's install Reaver. Click the Terminal button in the menu bar (or click Applications > Accessories > Terminal). At the prompt, type:
 apt-get update 
And then, after the update completes:
 apt-get install reaver 
How to Crack a Wi-Fi Network's WPA Password with ReaverIf all went well, Reaver should now be installed. It may seem a little lame that you need to connect to a network to do this, but it will remain installed until you reboot your computer. At this point, go ahead and disconnect from the network by opening Wicd Network Manager again and clicking Disconnect. (You may not strictly need to do this. I did just because it felt like I was somehow cheating if I were already connected to a network.)

Step 3: Gather Your Device Information, Prep Your Crackin'

In order to use Reaver, you need to get your wireless card's interface name, the BSSID of the router you're attempting to crack (the BSSID is a unique series of letters and numbers that identifies a router), and you need to make sure your wireless card is in monitor mode. So let's do all that.
Find your wireless card: Inside Terminal, type:
 iwconfig 
How to Crack a Wi-Fi Network's WPA Password with ReaverPress Enter. You should see a wireless device in the subsequent list. Most likely, it'll be named wlan0, but if you have more than one wireless card, or a more unusual networking setup, it may be named something different.
Put your wireless card into monitor mode: Assuming your wireless card's interface name is wlan0, execute the following command to put your wireless card into monitor mode:
 airmon-ng start wlan0 
This command will output the name of monitor mode interface, which you'll also want to make note of. Most likely, it'll be mon0, like in the screenshot below. Make note of that.
Find the BSSID of the router you want to crack: Lastly, you need to get the unique identifier of the router you're attempting to crack so that you can point Reaver in the right direction. To do this, execute the following command:
 airodump-ng wlan0 
(Note: If airodump-ng wlan0 doesn't work for you, you may want to try the monitor interface instead—e.g., airodump-ng mon0.)
You'll see a list of the wireless networks in range—it'll look something like the screenshot below:
When you see the network you want, press Ctrl+C to stop the list from refreshing, then copy that network's BSSID (it's the series of letters, numbers, and colons on the far left). The network should have WPA or WPA2 listed under the ENC column.
Now, with the BSSID and monitor interface name in hand, you've got everything you need to start up Reaver.

Step 4: Crack a Network's WPA Password with Reaver

Now execute the following command in the Terminal, replacing bssid and moninterface with the BSSID and monitor interface and you copied down above:
 reaver -i moninterface -b bssid -vv 
For example, if your monitor interface was mon0 like mine, and your BSSID was 8D:AE:9D:65:1F:B2 (a BSSID I just made up), your command would look like:
 reaver -i mon0 -b 8D:AE:9D:65:1F:B2 -vv 
Press Enter, sit back, and let Reaver work its disturbing magic. Reaver will now try a series of PINs on the router in a brute force attack, one after another. This will take a while. In my successful test, Reaver took 2 hours and 30 minutes to crack the network and deliver me with the correct password. As mentioned above, the Reaver documentation says it can take between 4 and 10 hours, so it could take more or less time than I experienced, depending. When Reaver's cracking has completed, it'll look like this:
A few important factors to consider: Reaver worked exactly as advertised in my test, but it won't necessarily work on all routers (see more below). Also, the router you're cracking needs to have a relatively strong signal, so if you're hardly in range of a router, you'll likely experience problems, and Reaver may not work. Throughout the process, Reaver would sometimes experience a timeout, sometimes get locked in a loop trying the same PIN repeatedly, and so on. I just let it keep on running, and kept it close to the router, and eventually it worked its way through.
Also of note, you can also pause your progress at any time by pressing Ctrl+C while Reaver is running. This will quit the process, but Reaver will save any progress so that next time you run the command, you can pick up where you left off-as long as you don't shut down your computer (which, if you're running off a live DVD, will reset everything).

How Reaver Works

Now that you've seen how to use Reaver, let's take a quick overview of how Reaver works. The tool takes advantage of a vulnerability in something called Wi-Fi Protected Setup, or WPS. It's a feature that exists on many routers, intended to provide an easy setup process, and it's tied to a PIN that's hard-coded into the device. Reaver exploits a flaw in these PINs; the result is that, with enough time, it can reveal your WPA or WPA2 password.
Read more details about the vulnerability at Sean Gallagher's excellent post on Ars Technica.

How to Protect Yourself Against Reaver Attacks

Since the vulnerability lies in the implementation of WPS, your network should be safe if you can simply turn off WPS (or, even better, if your router doesn't support it in the first place). Unfortunately, as Gallagher points out as Ars, even with WPS manually turned off through his router's settings, Reaver was still able to crack his password.
 Special thanks to life hacker

Read More

Firefox Tuning Make Firefox Faster
 Dear users, we are providing you with all the cool stuffs all the time! and we have recieved a good response from you in our posts. We need superfast  internet connectivity, and continuing in this way , we are sharing these firefox tweaks with you!

As you all know, Mozilla's Firefox browser is good. With a little minor "tweaking", however, you can make Firefox perform up to 40% faster for page transfers. With just a few clicks and some typing, you can experience faster browsing and surfing Firefox.

Here's How:
  1. Open the Firefox "config" page: click into the Firefox address location bar, and type about:config, press Enter.
  2. The "Config" file will appear in the Firefox browser as a page with hundreds of lines of code in it. Now, we start by enabling some advanced tabbed options:

  3. Locate the line browser.tabs.showSingleWindowModePrefs . (tip: press "b" on your keyboard to quick scroll).
  4. Double click on browser.tabs.showSingleWindowModePrefs . This will set its toggle to "true". Now your advanced and enhanced tabbing should be set.

    Note: in Firefox version 1.5, the command line is singlewindow.openintabs.
  5. Next: we will increase the "pipeline" RAM ability for Firefox to accomodate more packet transfer. In the same config document, scroll down to the line that says network.http.pipelining . Double click this line to set it to "true".
  6. Lastly, we will increase the maximum pipeline requests to 100. Find the line that says network.http.pipelining.maxrequests. Double click on it, and a dialog box will pop up. Change the setting from 4 to 100.
  7. No need to save this file. Simply close and restart Firefox, and you should see an immediate 10% to 40% increase in web page transfer speed, and faster opening of your tabbed windows! 
  8. Enjoy the best possible internet connectivity speed !
Read More

Turn you RAM into a Graphic card

  • WHILE URFING WEB WE COME ACROSS A TOOL WHICH CAN BE USED TO EMULATE GRAPHIC CARD ON THE RAM OF PC
    Play latest Games without Graphic Cards
  • Many times we are stuck up with a system that just doesn’t provide enough juice to run the latest game…the result being-
  • You either spend a pot of money (atleast Rupees 3500 or 70$) for getting the latest graphics card
  • Or you just read reviews of games like Crysis , Far Cry on gamespot and feel like a noob,fully knowing that your system just won’t be able to support it….
  • Take heart ! Here’s a wicked software with which you can beat 128-256 MB of graphics card requirements with a very modest 1GB DDR2 RAM.-Download
  • What it does is,it uses a part of your RAM as Graphics card memory. For example,if you got 1GB DDR2 RAM,then it’ll use 128MB of it as a Virtual Graphics card,and the remaining 896MB will be used as a regular RAM.
  • Cool right….so you can Virtually emulate NVIDIA GeForce TI 4600,NVIDIA GeForce FX 4900 ULTRA,ATi Radeon 8500, ATi Radeon 9800 PRO
Download- DOWNLOAD THIS TOOL
Read More

Torrent 2 Direct Link Converter (Online)

 Torrent 2 Direct Link Converter (Online)

Hello Users it's been so long that we were not able to provide latest stuff  to our dear users.But from now we will not let our users go empty hands from our Website.So here the tutorial Guys!

 How to use this ?
Step 1: Sign up for a Free account. (After signing up, check your email for account verification.)


Step 2: Visit your favorite torrent site. (Piratebay.org for this example).
Step 3: Copy the Direct-Link of your torrent file.


Step 4: Paste the link into Torrific then click 'GET'.  After that, it will show you the files included in that torrent. Just click "Initiate" then wait for it to be converted.

Step 5: Conversion completed! You can now download your files directly. Just click the File
(that website give you waite time depend on file size).
Enjoy.......
Read More

25 (Most Wanted) Tips For iPhone 3G

 25 (Most Wanted) Tips For iPhone 3G
We all know that the handy user experience of iPhone is one of the selling point. But not so many people do realize that there are several shortcuts, tips and tricks available on the iPhone which able to make life much easier.
We believe every single iPhone users would like to know all of the tips and tricks for every feature of iPhone. In fact, if you dig and explore a little deeper, you will know that you can actually do a lot more on your iPhone. With these lesser-known goodies, you can easily get the most out of your iPhone.
This week, we’ve collected some really amazing tips from Web and our own experiences to present you 25 most wanted tips for iPhone 3G. Full list after jump!
More:

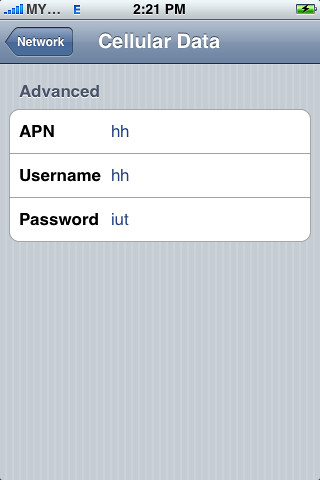
  1. How to Disable iPhone 3G GPRS or Edge Connection

    Tap "Setting – General – Network – Cellular Data Network". In the “APN, Username and Password" field, simply type in some words so iPhone will not pass the correct values to service providers. Restart your iPhone if necessary.
     25 (Most Wanted) Tips For iPhone 3G
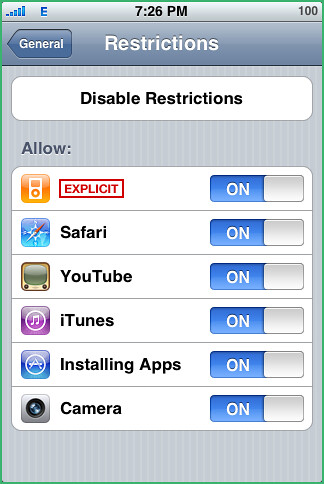
  2. How to Set Content Restriction

    You can set restrictions for iPod content for the use of some applications on iPhone. For example, parents can restrict explicit music from being seen on playlists, or turn off YouTube access entirely.
    Just go to “General – Restrictions” then tap Enable Restrictions and enter a four-digit passcode to restrict your content.
     25 (Most Wanted) Tips For iPhone 3G
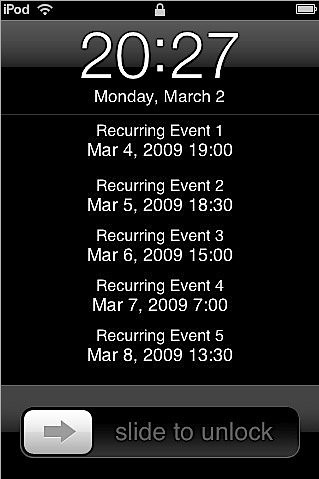
  3. How to Customize iPhone Wallpaper as Google Calendar and Notes

    gCalWall Lite enables users to add their upcoming Google Calendar appointments to their home/unlock screens.
     25 (Most Wanted) Tips For iPhone 3G
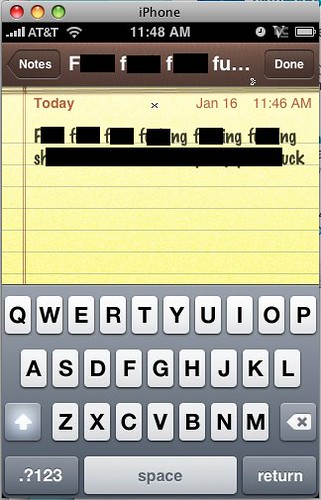
  4. How to Train your iPhone to Learn New Words

    You can train your phone to “remember” words if you type them repeatedly, but this tutorial will teach you a better way to train your iPhone to learn new words on the fly.
     25 (Most Wanted) Tips For iPhone 3G
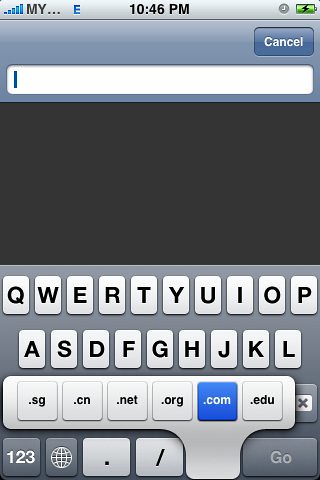
  5. How to Select Other Domain Name Endings

    When you type a website URL in the address bar, you can now hold down the ".com" button to get a selection of other domain name endings and tap on any of the endings to insert them in the address bar. [via tuaw]
     25 (Most Wanted) Tips For iPhone 3G
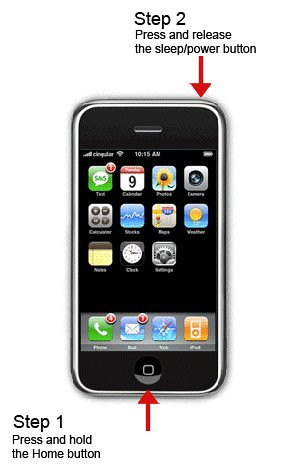
  6. How to Take Screen Shot

    Hold the "home" button, then hit the "power/sleep" button, the screen will momentarily flash, and the iPhone’s current screen contents will be saved to the Camera Roll.
     25 (Most Wanted) Tips For iPhone 3G
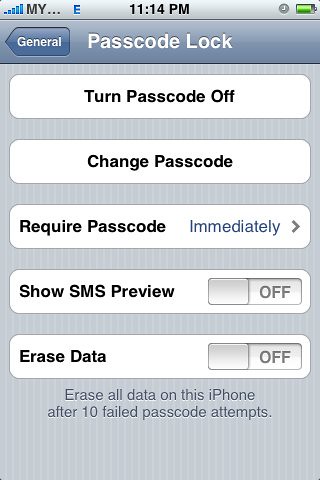
  7. How to Hide SMS Preview

    With Show SMS Preview disabled you will only get a generic "New Text Message".
    Go to "General > Passcode Lock" and enter a 4-digit passcode. After that disable "Show SMS Preview".
     25 (Most Wanted) Tips For iPhone 3G
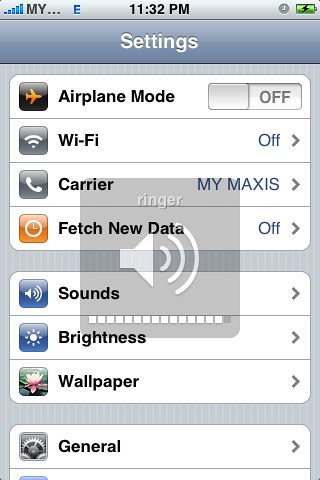
  8. How to Increase the Volume of the Ringer

    Your iPhone’s ringer volume issue can be resolved by using a custom ringtone rather than ringtones currently available on the iPhone.
     25 (Most Wanted) Tips For iPhone 3G
  9. How to Save Images in Safari and Mail

    Just touch and hold an image in Safari or Mai, an action sheet will be presented to enable you to save the image. The image will get stored in the “Saved Photos” library of the Photos app.
     25 (Most Wanted) Tips For iPhone 3G
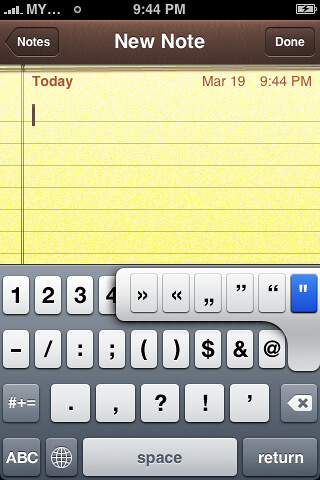
  10. How to Insert Extra Punctuation Keys

    Touch and hold the punctuation key and you get a set of additional keys to choose from.
     25 (Most Wanted) Tips For iPhone 3G
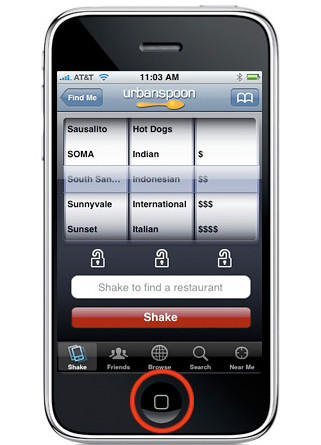
  11. How to Force Quit An App

    Have you ever been using an app and it’s become completely frozen? You can actually apply a force quit on it by pressing the Home button for at least six seconds.
     25 (Most Wanted) Tips For iPhone 3G
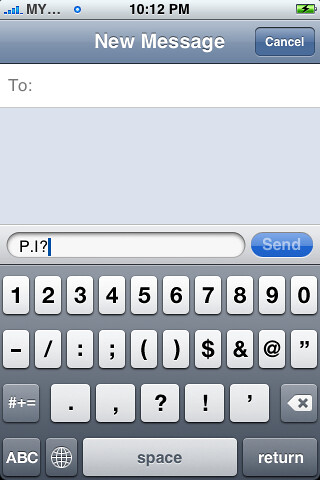
  12. How to Switch Punctuation Keys to Alphabet Keys Quickly

    Mode changes in between the punctuation keys and alphabet keys are pretty annoying. To solve it, just press the “.?123″ key, but don’t lift your finger as the punctuation layout appears. Slide your finger a half inch onto the period or comma key, and release. The ABC layout returns automatically.
     25 (Most Wanted) Tips For iPhone 3G
  13. How to Fast Forward/Rewind Music & Video

    Press and hold the skip forward/back arrows to fast forward or rewind rather than skip tracks. Also, press on the album art to manually FF/rewind.
     25 (Most Wanted) Tips For iPhone 3G
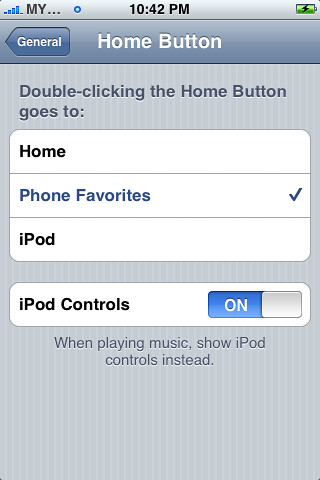
  14. How to Access iPod Controls or Phone Favorites Instantly

    Go to "Settings – General – Home Button". You can customize by double-clicking the Home Button goes to Home, Phone Favorites or iPod Controls.
     25 (Most Wanted) Tips For iPhone 3G
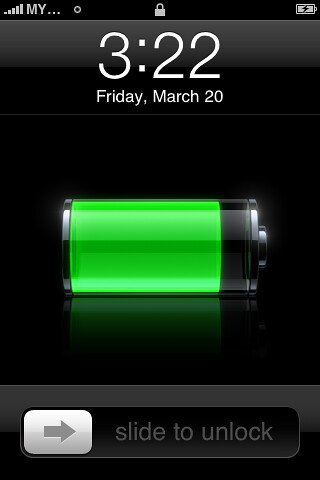
  15. How to Maximize iPhone Battery Life

    Here’s how to live with the iPhone’s battery life while using it a whole lot.
     25 (Most Wanted) Tips For iPhone 3G
  16. How to Erase iPhone Data Thoroughly

    A method that should wipe out almost all remnants of your personal data.
    3434339798 6294266240 o 25 (Most Wanted) Tips For iPhone 3G
  17. How to Backup Your iPhone Contacts

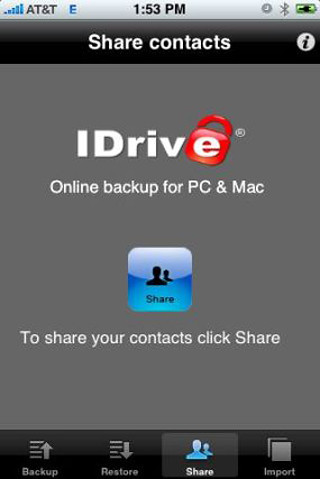
    A neat application dubbed IDrive Lite that allows you to backup, share and restore all your iPhone contacts completely free of charge if you’ve updated your iPhone software to 2.0.
     25 (Most Wanted) Tips For iPhone 3G
  18. How to Design iPhone Themes

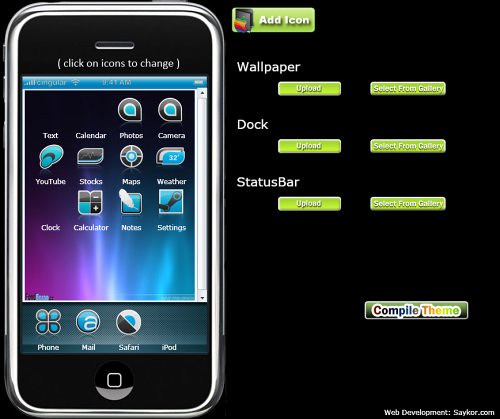
    If you’re bored with your default iPhone theme and plan to get more funky on it, you can visit iPhone Theme Generator and grab your own customized theme. It also provides a very good guide on how to install the theme into your iPhone.
     25 (Most Wanted) Tips For iPhone 3G
  19. How to Access the Scientific Calculator

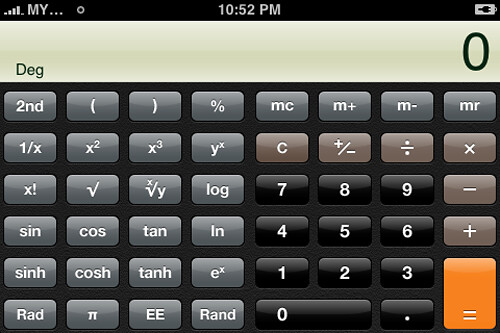
    To access the scientific calculator, just rotate your iphone sideways into landscape orientation while using the calculator.
     25 (Most Wanted) Tips For iPhone 3G
  20. How to Share Your iPhone Apps with Others

    Melvin Rivera has a great step by step set up, so if you are a multiple iPhone family then you may want to head on over and check it out.
     25 (Most Wanted) Tips For iPhone 3G
  21. How to Use iPhone as External Disk

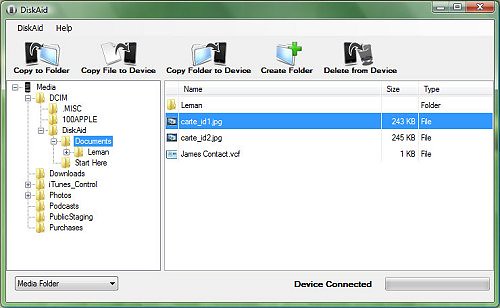
    DiskAid is a tool (freeware) for PC and Mac which enables to use your iPhone or iPod Touch as external Disk. With DiskAid you can transfer files and folders via USB between your device and your Computer.
     25 (Most Wanted) Tips For iPhone 3G
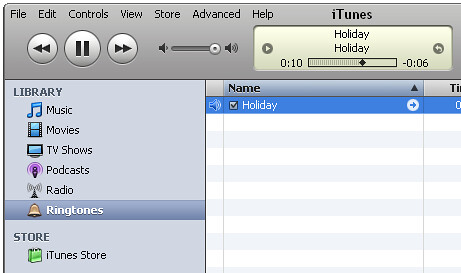
  22. How to Create Free iPhone Ringtones Using iTunes in Windows

    A few steps you can actually convert a DRM-free song into a ringtone using only iTunes in Windows.
  23.  25 (Most Wanted) Tips For iPhone 3G
  24. How to Convert Videos for Your iPhone

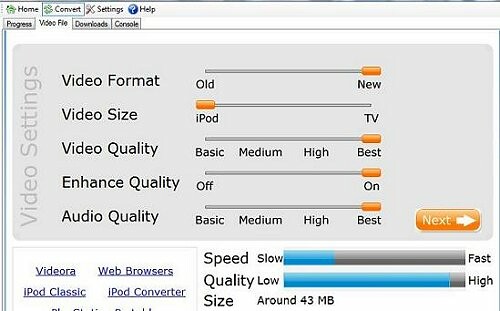
    An useful resource for converting videos online as well as off. This tutorial also teaches you on how to copy videos to your iTunes and iPhone.
     25 (Most Wanted) Tips For iPhone 3G
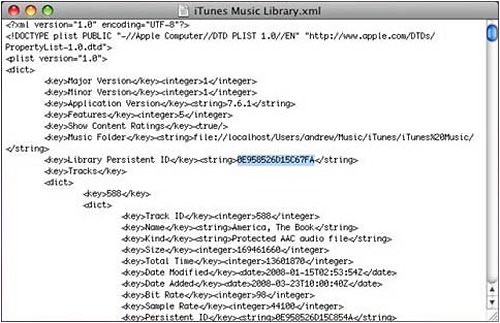
  25. How to Sync An iPhone with Multiple Computers

    This tutorial allows you to add music/videos/podcasts from multiple machines.
     25 (Most Wanted) Tips For iPhone 3G
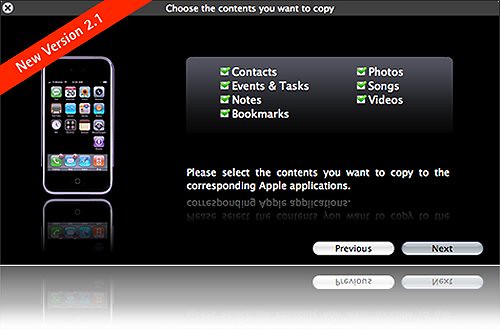
  26. How to Migrate Cell Phone Data to iPhone 3G

    Fone2Phone can help you migrate contacts, events, tasks, notes, bookmarks, photos, music and movies to the iPhone 3G.
     25 (Most Wanted) Tips For iPhone 3G
Read More

© Copacopi, AllRightsReserved.